You are in need of the final Creamy Butterfinger cheesecake, then you ought to take this recipe. It is creamy, velvety, with chunks of Butterfinger candy, and a layer of chocolate ganache, and a foundation of luxurious chocolate cookie crust. Each bite gives that ideal flavor of the mixture of peanut butter, chocolate and smooth cheesecake.
This dessert appears to be of bakery-level, and yet, it can be made at home. Butterfinger cheesecake is an indulgent creamy cake that will definitely steal the show whether you are making it on a birthday, a holiday, a family gathering or you are just feeling like having something indulgent.
Let’s get started.
Why This Creamy Butterfinger Cheesecake Is So Special
So, what is distinctive about this cheesecake?
- Ultra-smooth, creamy texture
- Butterfinger bites were crunchy and were added to the filling.
- Rich chocolate cookie crust
- Chocolaty topping- thin chocolate ganache.
- Just just right amount of sweetness and salt.
- Make-ahead friendly
This creamy Butterfinger cheesecake is what is really memorable since it is contrasted between smooth cheesecake and crunchy candy pieces.
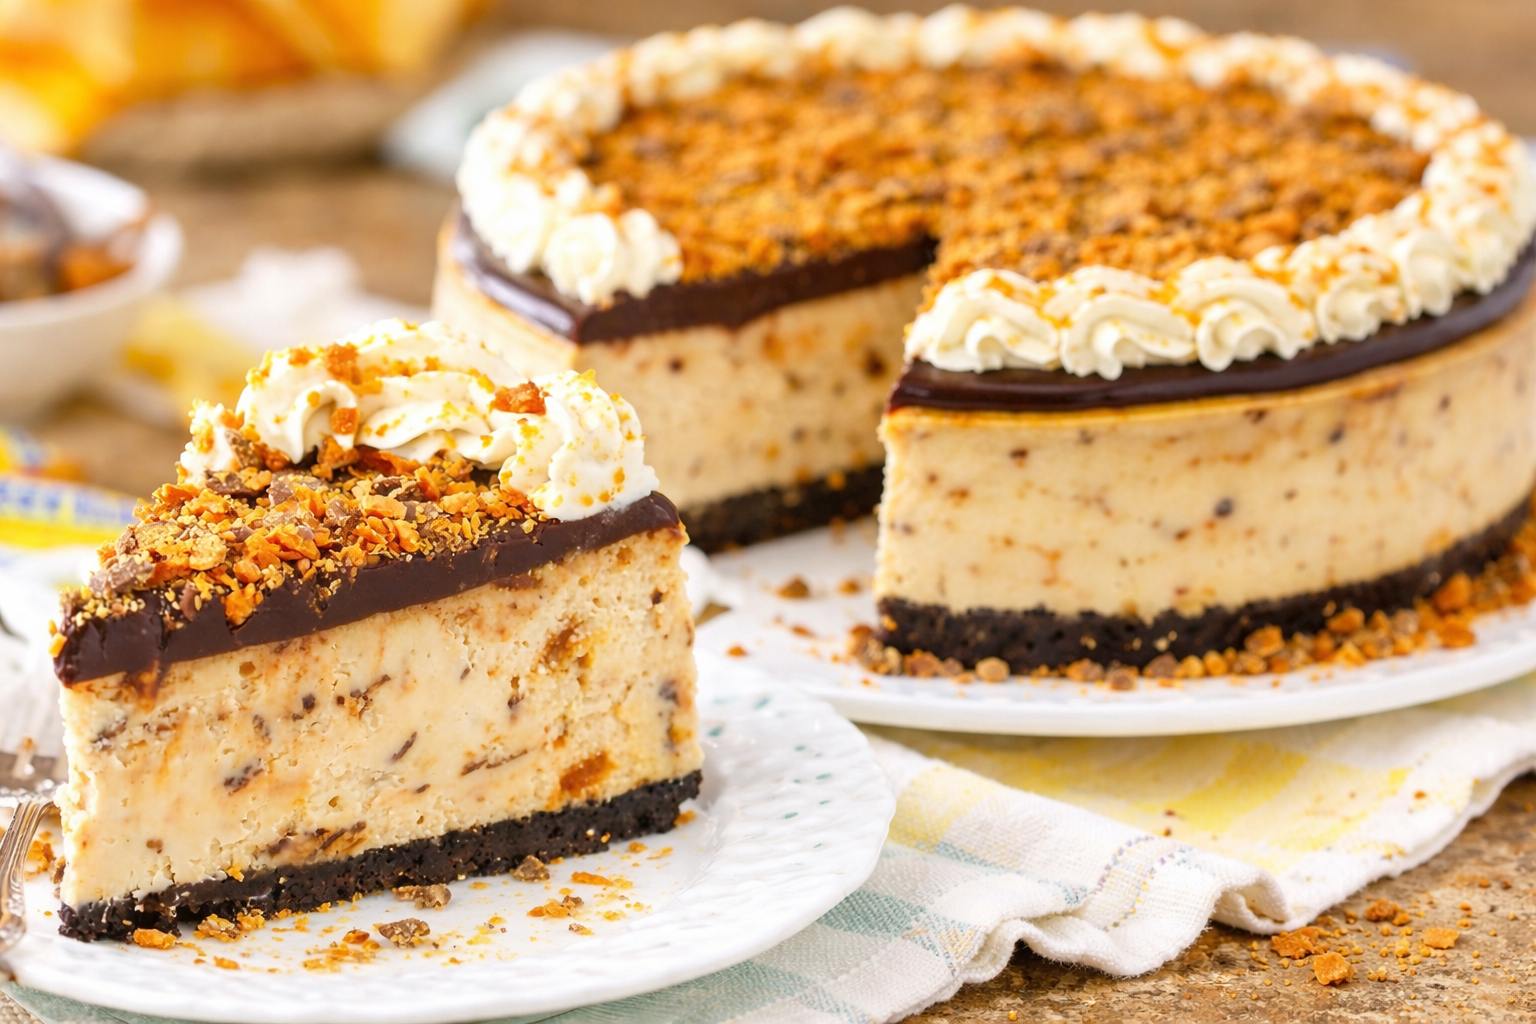
Creamy Butterfinger Cheesecake
Ingredients
Equipment
Method
- Preheat oven to 325°F (163°C). In a medium bowl mix chocolate cookie crumbs and melted butter until the mixture resembles wet sand. Press firmly into the bottom of a 9 inch springform pan using the back of a measuring cup. Bake for 10 minutes then remove and allow to cool while you prepare the filling.
- Beat softened cream cheese in a large mixing bowl on medium speed for 2 to 3 minutes until completely smooth. Add granulated sugar and beat until creamy and well combined.
- Mix in peanut butter, vanilla extract, and almond extract and beat until smooth. Add eggs one at a time mixing on low speed after each addition. Do not overmix to prevent cracking.
- Fold in sour cream until just combined then gently fold in crushed Butterfinger pieces. The batter should be thick, smooth, and creamy.
- Pour the filling over the cooled crust. Wrap the outside of the springform pan tightly with aluminum foil. Place the pan inside a large roasting pan and add hot water to the roasting pan until it reaches halfway up the sides of the cheesecake pan.
- Bake for 60 to 70 minutes until the edges are set and the center still has a slight jiggle. Turn off the oven and leave the door slightly ajar. Allow the cheesecake to sit in the oven for 1 hour.
- Remove from the oven and allow to cool completely at room temperature. Refrigerate for at least 6 hours or overnight for best results.
- Place chocolate chips in a heatproof bowl. Heat heavy cream until just simmering then pour over the chocolate chips. Let sit for 2 to 3 minutes then stir until smooth and glossy.
- Pour the ganache over the chilled cheesecake and spread evenly. Refrigerate for an additional 30 minutes until the ganache is set.
- Garnish with extra crushed Butterfinger crumbs, whipped cream swirls, and a chocolate drizzle if desired. Slice and serve chilled.
Notes
Do not overmix after adding the eggs — overmixing incorporates too much air and causes cracking.
Never skip the water bath — it creates a gentle, even heat that prevents cracking and gives the cheesecake its ultra creamy texture.
The gradual cooling process in the oven and then at room temperature is essential — rushing this step causes the cheesecake to crack.
Cheesecake is best made the day before serving as the flavor and texture improve significantly overnight.
Use a sharp knife wiped clean between each slice for the cleanest cuts.
Tips for the Creamiest Butterfinger Cheesecake
Below are some tips that would ensure success:
Suppliers Room Temperature Ingredients.
Lumps are formed when using cold cream cheese. Cream cheese, eggs and sour cream should always be at room temperature.
Don’t Overmix
Cracks may be contributed by overmixing.
Always Use a Water Bath
It helps avoid cracks and makes the cheesecake wet and creamy.
Chill Overnight
It also gets dramatically better after spending a complete night in the fridge in terms of flavor and texture.
Storage Instructions
Refrigerator:
Keep in the fridge of the store up to 5 days.
Freezer:
Roll in wrap and freeze up to 2 months. Overnight refrigeration.
Variations You Can Try
Want to switch it up?
- Add chocolate chips in miniature amount to the batter.
- Peanut butter was swirled and then baked.
- Instead use a graham cracker crust made of chocolate.
- Prepare small butterfinger creamy cheesecakes in cupcake tins.
Frequently Asked Questions
Is it possible to prepare this cheesecake without water bath?
Yes, but it may crack slightly. The texture is also not as creamy.
Is it possible to use peanut butter that is crunchy?
You may, though it will take away the smooth finish of the cream Butterfinger cheesecake a little.
How do I know when it’s done?
The gelatin should appear not liquid, but to be jiggling somewhat like a gelatin.
This Butterfinger Cheesecake is Ideal For
This dessert is ideal for:
- Birthday parties.
- Dinner tables of thanksgiving dessert.
- Christmas gatherings.
- Potlucks.
- Dinner parties.
- Weekend indulgence.
It cuts well, is visually appealing and even better the following day.
Final Thoughts
This cream Butterfinger cheesecake is a combination of all your favorite parts of peanut butter, chocolate and traditional cheesecake all in one memorable meal. It is smooth, is rich, is crunchy, and is not that hard to make.
After you have tried it, it can be your new cheesecake recipe.
Should you prepare this recipe, please tell me what happens. And remember to freeze it, also, as you will surely want to repeat this creamy Butterfinger cheesecake.
Tried this recipe? Leave a rating for Grandma’s Kitchen Secrets recipe and comment below — we love hearing from you!
Happy Baking!









Leave a Reply